When I started writing this post, my intention was to show off some of the capabilities of NetworkMiner for recovering files from network packet captures. I have used NetworkMiner a few times to recover malware from pcaps. I like it because it automates the process. My plan was to contrast NetworkMiner's automated process against the more manual process of extracting files using Wireshark and a hex editor or the `foremost` command.
However, NetworkMiner failed to automatically extract all the files that were being downloaded in the pcap file I was using. This underscores the importance of testing your tools. I have successfully used NetworkMiner with other pcaps to extract all files, so you mileage may vary. If you've got a packet capture that you want to extract files from, my suggestion would be to try NetworkMiner, it will almost certainly extract most files, if not all, but you'll want to double check to make sure all files were successfully extracted. If you find that they are not, here's a short tutorial on how you can extract the files manually.
Extracting binaries from pcap files using Wireshark
Open your pcap file in Wireshark, if you want to play along at home, the Network Miner project site keeps a list of places where you can get some sample pcap files here. I know there are more sites that are not listed, if you know of a good one, please put send a comment. The pcap file I'm using in this example is the one that's listed as
CWSandbox, Sandox execution of malicious ActiveX component (downloads Downloader-BKH) from the list above.
Once the pcap file is open in Wireshark, you should see something like this:
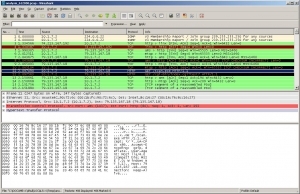
Note that packet number 11 is highlighted. If you look under the Info column, you'll see it's an HTTP GET request for a file called scan.exe.
In the Figure 2, I've right-clicked on that packet bringing up the popup menu where I've highlighted the "Follow TCP Stream" option.
.jpg)
After clicking "Follow TCP Stream," Wireshark presents a separate window as shown below in Figure 3. In this window, Wireshark shows the data content of the TCP packets for the file download that began in packet 11. Note that the window shows both halves of the conversation, one host's traffic is in pink and the other is in blue.
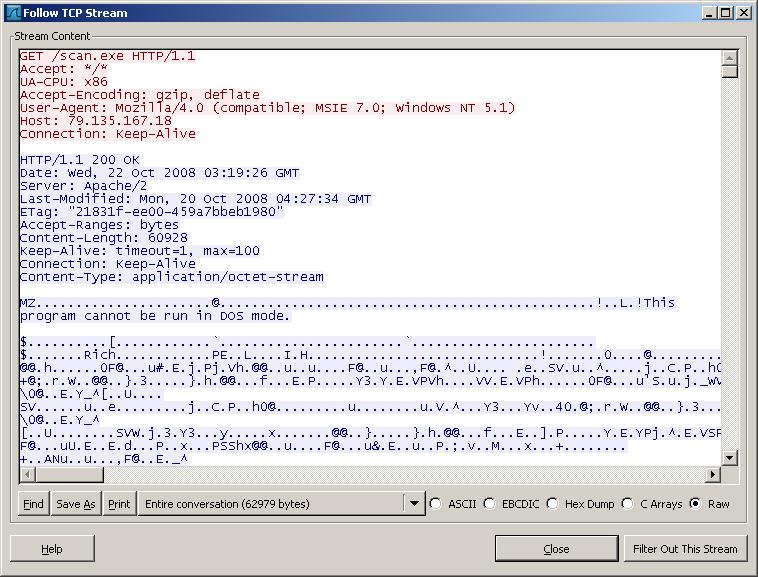
At the bottom of the "Follow TCP Stream" window there's a drop down button that can be used to filter out one half of the conversation between the host that requested scan.exe and the host that's serving it. In our example, we'll filter out the traffic from the host that requested the file so we're only left with the traffic from the server. Since we want to recover this file from the pcap, make sure the "Raw" radio button is selected and then click "Save As" and save the file somewhere on your file system, but BE CAREFUL IT CONTAINS MALWARE.
In the next screen shot, you can see the `file` utility reports the extracted file is a data file. Following the `file` command, I ran `foremost` against it. Foremost is useful for extracting data from hard drive images and in this case, regular files. By default `foremost` creates an output directory and sorts the extracted files into subdirectories based on file type. On the next line, I ran the `file` command again against the exe file that the `file` command extracted. As you can see, it is correctly identified as a Win32 binary.

Using the file and foremost commands
There are other ways to extract the files. You could open the file in a hex editor and carve it out manually. If you look in the next screen shot, you'll see the output of the `xxd` command against the file that was extracted from Wireshark. Note the presence of the two byte file header "MZ" ($4D5A in hex) that begins at offset 128. If you delete everything before that using a hex editor, you're halfway to carving out the Windows executable manually.

XXD file header
In the next screen, you'll see the output of `xxd` showing the end of the binary at byte offset $EF2C, by deleting all the bytes from that point on, the original executable will be recovered and in a form that can be executed on a Windows box for behavioral analysis or loaded into a disassembler for static analysis.
I would be remiss to not mention NetworkMiner again before closing. As I said at the start, I have used it successfully to automatically recover binaries from pcap files. And NetworkMiner has some other features that I really like such as Michal Zalewski's p0f that will tell you what operating systems are being run on the hosts you're monitoring. Take a look at the following screenshot and look at the tabs to get an idea of some additional functionality provided by NetworkMiner:
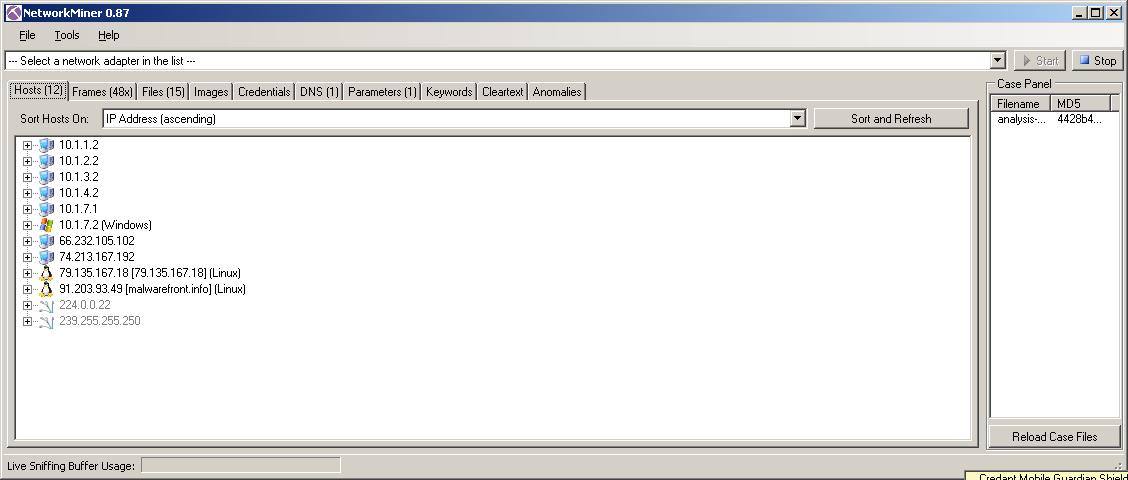
NetworkMiner
I look forward to seeing Network Miner improve and mature, it has a lot of promise, but as always, be sure you test your tools and remember that there's more than one way to do whatever it is that you're trying to accomplish during your examination. What are your favorite tools and techniques?
Dave Hull, GCFA Silver #3368, is an aspiring maker and technologist specializing in information security. He is the principal consultant and founder of Trusted Signal.
